
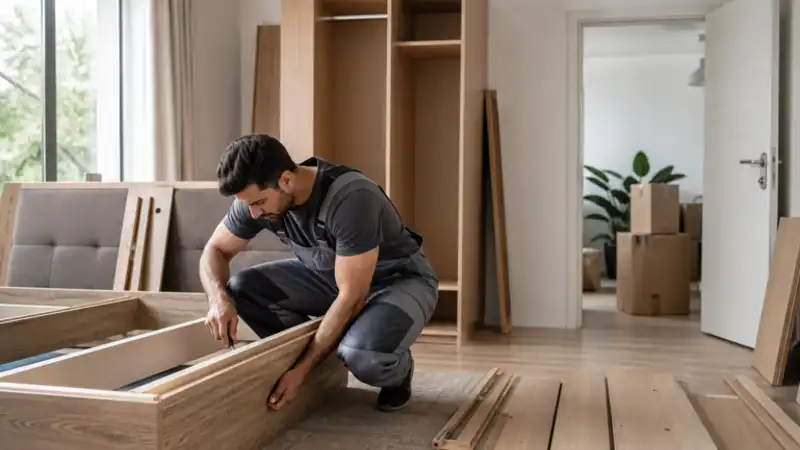
A king size bed that sails into the bedroom rarely leaves it so easily. Narrow doorways, tight stair turns and hallway corners are where scratched finishes, marked walls and gouged floors happen, so the usual fix is to dismantle furniture before moving day rather than force the piece through. But dismantling is not an all-or-nothing job, because some connections are designed to come apart while others are glued, fragile or under tension, and taking those apart does more harm than good.
This guide shows you how to decide what needs to come apart, prepare a protected workspace, and organise the parts so reassembly is straightforward. It then gives separate sequences for standard beds, freestanding wardrobes and dining tables, with clear points at which to stop and call in professional help.
Decide what to dismantle before moving and prepare a protected workspace
Start with a tape measure, not a screwdriver. Measure each large piece at its widest, deepest and tallest points, then measure the route it must travel: doorways, corridors, stair turns and landings, ideally at both homes. Allow for padding and for room for carriers to hold the piece, because the width of the opening is only part of the story. Dismantle only as far as access and safe handling require, so a bed that clears the hallway with its headboard removed does not need every slat unscrewed.
Next, check the manufacturer’s instructions and look closely at the joints. Bolts, screws and cam locks are made to be released, whereas glued joints and permanent apron connections are not. Never force a seized fixing, and think twice before taking apart fragile flat-pack furniture, which can lose its grip in the holes once it has been assembled and released.
Gather correctly sized screwdrivers and Allen keys, a spanner if the fittings need one, labelled hardware bags, a marker, a phone and clean protective blankets. Hand tools give you far better control than a drill, which can strip fixings in seconds. Clear enough floor to lay parts down safely and cover it with clean, non-slip protection, then pad vulnerable corners and doorframes without sticking adhesives to paint. Keep exits clear and line up a second person for any heavy section.
Before releasing anything, photograph the assembled piece and each connection. Then label matching parts and their orientation using tags or labels on the wrapping, and bag fixings by furniture item and assembly stage, keeping different screw lengths identifiable. Rest detached parts on clean padding, wrap exposed edges and finished surfaces, and secure each hardware bag within the wrapping instead of taping it to veneer, polish or paint. Lift components rather than dragging them.
Furniture Dismantling Before a Move: How to Take Apart Beds, Wardrobes and Dining Tables Without Damaging Your Home Décor
Take apart a standard bed while supporting the frame
Begin by stripping the bedding and lifting off the mattress, which should be protected and kept out of your working route. Then remove any storage drawers and loose components so you are dealing with the bare frame.
Following the manufacturer’s sequence, photograph and label the slats, then take out detachable slats and centre supports while the rest of the frame is still stable. Ask a helper to support the headboard, footboard and rails before you undo their connections, and separate one supported section at a time. Leaving a heavy end balanced on loosened fittings is how frames crack and floors get dented.
Bag rail and support fixings separately from the headboard hardware, and wrap rails and headboard edges so exposed brackets cannot scratch neighbouring surfaces.
Stop if the bed has a gas-lift or other tensioned mechanism, inaccessible fittings, or wall-mounted components whose removal is unclear. Do not disconnect loaded struts or improvise a release method, because that is a job for someone with the right experience.
Dismantle a freestanding wardrobe without losing stability
A wardrobe is tall, top-heavy and easily destabilised, so the sequence matters more here than anywhere else. Empty it completely, then remove loose shelves, drawers and detachable hanging rails, photographing shelf positions and fittings as you go.
Leave any anti-tip restraint in place during this early preparation. Before releasing a wall restraint, arrange secure support and enough helpers so the wardrobe cannot tip, as one person holding it is not adequate. Support each ordinary door before releasing its hinges according to the instructions. Heavy mirrored doors, unfamiliar sliding-door mechanisms and an unstable carcass are all stop points where a professional should assess the job.
Once the doors are off, move the supported carcass into the manufacturer’s recommended dismantling position on a padded floor. Only then release the panel connections, in the specified order, and never remove a structural back or side while the wardrobe stands unsupported.
Label paired panels, top and bottom orientation and door positions, and keep hinge hardware grouped by door. Protect panel edges, and stop if cam-lock holes or boards begin to crumble. Fitted wardrobes should be left to a suitably qualified specialist. At the new home, rebuild the wardrobe and restore a suitable anti-tip fixing before loading or using it, checking that you have permission for wall work if you rent.
Remove dining-table legs without stressing the top or joints
Take out any loose extension leaves first, following the release instructions, and wrap each one individually. Do not dismantle the extension mechanism unless the manufacturer confirms that you can do so.
Inspect the underside to see whether the legs are bolt-on or the base is detachable, since glued legs and permanent apron joints should stay intact. With enough helpers, support or turn a suitable table onto a clean, padded surface as instructed. Never balance it on a finished edge, and never remove legs while the unsupported top could fall.
Support each leg or base section before undoing its fixings, label its position, and keep its bolts, washers and brackets bagged together. Then wrap the tabletop, corners and legs separately, keeping protruding fittings away from polished surfaces. Glass tops, and tops too heavy to control safely, are specialist handling jobs.
When rebuilding, use your photographs and labelled positions, start threaded fixings by hand and tighten as instructed without overtightening. Check the table is stable before anyone uses it.
Know when to stop DIY and confirm professional dismantling
Call for an assessment when weight, fragile finishes, damaged joints, tensioned mechanisms or restricted access go beyond your tools and safe handling capacity. Some pieces suit a furniture specialist better than a general removal crew. If you are unsure whether moving companies will dismantle your furniture for you, ask early, because availability and inclusions vary between companies and bookings, so never assume dismantling comes with a standard move.
Before booking, send the furniture types, photographs, manufacturer instructions and access measurements, and flag stairs, narrow turns, glass, mirrored doors and gas-lift mechanisms. Then confirm which items you will dismantle and reassemble, identify any exclusions, explain how you calculate the charges, and clarify whether you need to arrange specialist work separately. Agree who handles anti-tip restraints and other wall fixings, and who is responsible for reinstatement, wall repairs or landlord permissions.
The decision rule is simple: tackle only supported, designed connections yourself. And arrange help before loosening anything you are unsure about.